


How to Make Custom Plastic Parts?
So, you want to create custom plastic parts but don’t know where to start? Relax—this guide breaks it down for you in simple steps. Whether you’re new to manufacturing or just looking for tips, we’ve got you covered.
Step 1: Figure Out What You Need
As a beginner in manufacturing plastic products, you may have questions regarding how to produce custom plastic parts. The process involves several stages; following an established sequence is essential to ensure accurate part production. With so many factors and technologies present today in plastics, it may not seem very safe at first. Want more details? This article breaks down the production process of custom plastic components and discusses some of its challenges.
Quick Tip: If you’re unsure, start with the basics: what does the part need to do, how big does it need to be, and what environment will it be used in?
2. How to Design Your Part?
If you are considering custom plastic components, chances are you already have an idea for their design. Begin by sketching this concept. Make sure it contains all the crucial details. If necessary, have someone else draw it for you, but remember—the more precise and detailed your sketch is, the better!
Once you have your sketch in hand, ask an engineer to create 3D models of your part using 3D software. Here, you will start to spot any flaws; sometimes, this may require trial and error before everything comes together perfectly.
Utilizing CAD software and digital simulations can be invaluable when refining designs for physical prototypes, saving both time and resources. Software such as SolidWorks or AutoCAD allows precise modelling, testing, and analysis under various conditions. Once approved, 3D printing offers fast production of physical prototypes for real-world testing and adjustments.
It would be wise to consult a plastic part engineer at this stage. They can advise whether your design is practical for manufacturing and will perform as desired, providing valuable feedback that could improve it further.
Pro Tip: Don’t skip the prototype—fixing problems in this stage is easier than during production.
3. Pick How You’ll Make It
There are several ways to make plastic parts, such as compression moulding, polymer casting, and vacuum forming. However, when it comes to custom plastic components, injection moulding is the most popular option.
Injection moulding is often the preferred method for custom designs because it balances cost and functionality well. While the initial tooling and setup might be pricey, once that’s done, you can quickly and efficiently produce millions of parts.
This process is consistent and accurate, especially with wall thickness and tight tolerances. Plus, it can handle complex shapes, allowing you to create almost any product you can think of!
4. Build a Prototype
Before embarking on total production, it’s wise to construct prototypes similar to your design to evaluate its performance and detect any issues as early as possible. Prototypes allow testing how it functions and catching any early hiccups.
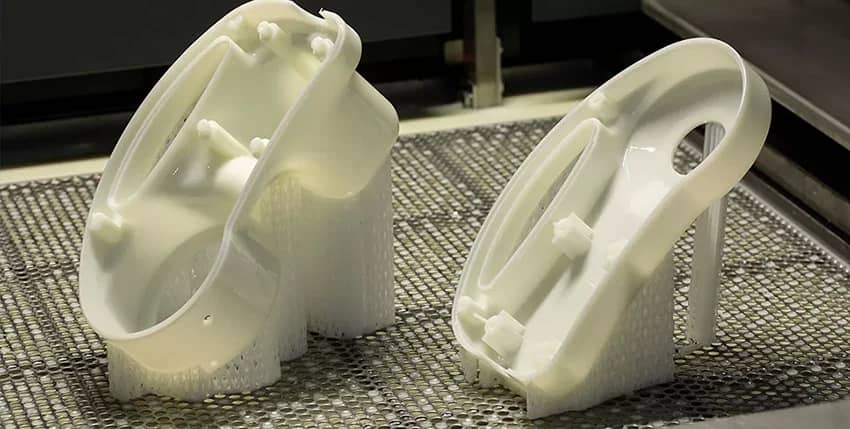
Once you have your prototype and understand how it functions, it will be much easier to identify any changes necessary for manufacturing. Be mindful of your budget; adding superior materials or cosmetic features may significantly increase costs.
Be patient, as this stage may take time. Take your time testing and refining your prototype to minimize issues down the road.
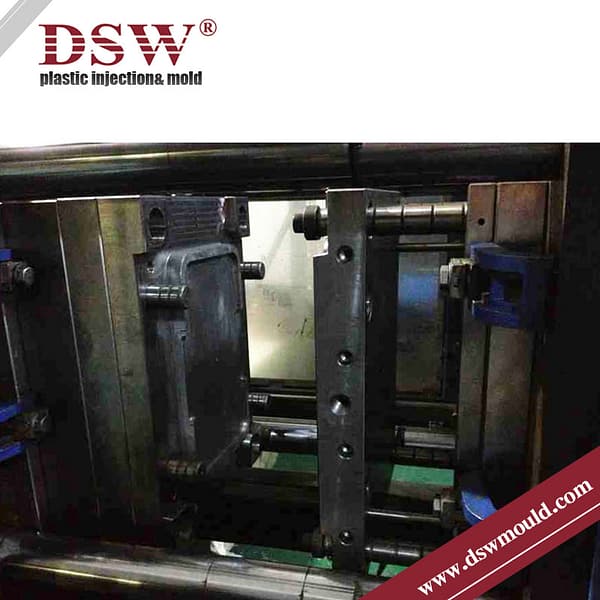
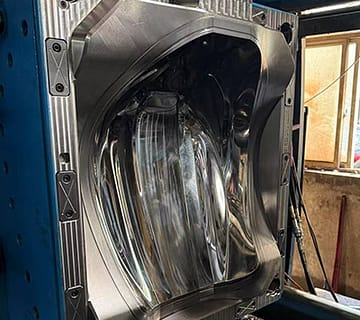
5. How To Make a Mold
Once you have your design and material, it’s time to make the mold. This typically involves cutting, shaping, and finishing the material to match your design. Depending on the complexity of your mold, you can do this with CNC machining or 3D printing.
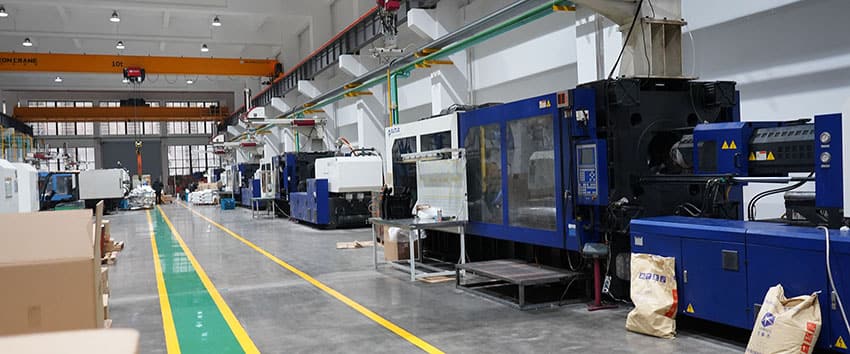
6. Fabricating Custom Plastic Parts
Producing custom plastic parts is critical to realizing any design idea, and success at this step depends heavily on your team or partners’ manufacturing capabilities. At this stage, it is also crucial that you decide if production should occur internally or be outsourced to specialists.
A. Compare In-House with Outsourced
- In-House Manufacturing:
With the right equipment, skilled workforce, and technical know-how, in-house manufacturing offers greater control of production timelines, quality standards, intellectual property protection, and security. However, this option requires significant capital investments, maintenance expenses, and trained personnel, all of which increase costs significantly. - Subcontract to a Specialized Manufacturer:
Outsourcing to a dedicated plastic parts manufacturer can be more cost-effective when producing complex or large-scale parts, particularly complex designs or large production runs. Many providers provide comprehensive services, including design consultation, prototyping, tooling, production, finishing, assembly, packaging and shipping, to fully take advantage of their expertise and state-of-the-art facilities while reducing operational burdens.
How to Make Custom Plastic Parts Efficiently
Crafting custom plastic parts can be a complex process, but you can streamline and streamline it with these tips:
- Choose the Right Team: Selecting engineers and manufacturers is paramount to successfully navigating any process and producing high-quality plastic parts. Trained professionals will assist with streamlining the production process, helping avoid common pitfalls, and optimizing design possibilities.
- Be Realistic: Don’t set yourself up for failure by setting high expectations. Speak to experts to assess whether certain features of your custom part can be made feasible and adjust expectations according to practical considerations. They may provide invaluable advice.
- Stay Flexible: Being adaptable helps accelerate revisions more rapidly. Be open to feedback and ready to make changes your engineers or manufacturers suggest; flexibility can speed the development process and result in a superior final product.
- Consider Costs and Materials: when you refine your design and prototype, monitor costs and materials. Decide if you need higher-quality materials or additional features and how these choices impact your budget. Understanding these factors will help you make informed decisions and avoid unexpected expenses.
Highlight Challenges
Custom plastic parts can present challenges such as shrinkage, warping, and tooling errors. To mitigate these issues, conducting comprehensive design reviews, applying the appropriate material shrinkage factors, and investing in high-quality moulds is essential. Collaborating with experienced manufacturers can also help anticipate problems and deliver effective solutions.
7. Finish Up
Once you have produced your custom plastic parts, the finishing stage is crucial to ensure they meet your quality standards and look precisely as you envisioned.
A. Trimming and Deburring
- Trimming: After molding the part, you often find excess material or ‘flash’ around the edges. You can trim this using manual tools like knives or automated precision machinery.
- Deburring: This involves removing sharp edges or burrs that can occur during the moulding process. Deburring can be done manually with abrasive tools or mechanical methods such as tumbling or vibratory finishing.
B. Smoothing and Surface Finishing
- Sanding: You may need to sand the part to achieve a smooth surface. This can involve various grits of sandpaper, starting with rough grit and moving to finer ones to achieve a smooth finish.
- Polishing: The surface often needs to be polished to achieve a high-gloss finish. Polishing compounds and buffing wheels can effectively remove fine scratches and create a shiny appearance.
- Texturing: If the part needs a specific texture or pattern, specialized equipment or processes can apply it. Texturing can enhance the part’s aesthetic appeal and functionality.
C. Painting and Coating
- Painting: Painting is the next step if your part requires a colour or protective layer. Choose the correct type of paint that adheres well to the plastic and is suitable for its intended use. Techniques include spray painting, dip coating, or brush application.
- Coating: To provide additional protection, you can coat parts with materials like powder coatings, which enhance durability and resist environmental factors. Depending on the application, you might also use anti-corrosion, anti-abrasion, or UV resistance coatings.
D. Assembly (If Needed)
- Component Assembly: If your custom part is part of a larger product, you may need to assemble it with other parts. This can involve various methods, such as ultrasonic welding, adhesive bonding, or mechanical fasteners.
- Functional Testing: Before finalizing, ensure all assembled components fit and function correctly. This might involve checking for proper alignment, secure fastening, and overall functionality.
E. Quality Control
- Dimensional Inspection: Verify that the part dimensions match your specifications. Tools like Coordinate Measuring Machines (CMM) or optical comparators can provide precise measurements.
- Performance Testing: Conduct tests to ensure the part performs as intended under real-world conditions. This could include stress testing, durability assessments, or functionality checks.
F. Final Checks
- Visual Inspection: Perform a thorough visual check to ensure no defects, blemishes, or inconsistencies. This includes checking for colour uniformity, surface finish quality, and overall appearance.
- Documentation: Maintain records of the finishing process, including any issues encountered and how they were fixed. This documentation can be helpful for future reference or for addressing any potential customer concerns.
By following these detailed steps in the finishing process, you can ensure that your custom plastic parts meet functional requirements and have an appealing and professional finish.
8. Quality Control and Assurance
Quality control is integral to the fabrication process, ensuring that every part meets your specifications and standards. Even with prototypes and trusted manufacturers, consistent monitoring is necessary to maintain quality throughout production. Critical elements of effective quality control include:
- Regular Inspections and Testing: Implement a robust inspection process, including pre-article inspections, in-process checks, and final product testing. Validate part quality using dimensional analysis, surface finish assessments, and functional testing.
- Process Validation: Ensure the manufacturing process is validated to maintain consistency. This involves setting up detailed production parameters, such as mold temperature, injection speed, and pressure settings, which are critical for maintaining the integrity of the parts.
- Feedback Loops: Maintain open communication channels with your manufacturer to address any deviations from specifications quickly. Continuous feedback helps identify issues early, allowing for timely adjustments and reducing the risk of defects.
- Documentation and Compliance: Ensure that all production processes are well-documented and that your manufacturer complies with relevant industry standards and certifications (e.g., ISO 9001, IATF 16949). This ensures quality and enhances traceability and accountability throughout the production cycle.

